How To Replace the Upper and Lower Thermostat Housing on a Ford 4.0L V6 SOHC Engine
Steps 7-9
Step 7: Install New Lower Thermostat Housing
Now you're ready to install the new parts. Most of the work comes now, with the installation of the lower thermostat housing. To start, find the lower thermostat housing gasket. Wet your finger with a bit of fresh coolant, and wipe it on the gasket. Then install the gasket into the slot on the underside of the housing.
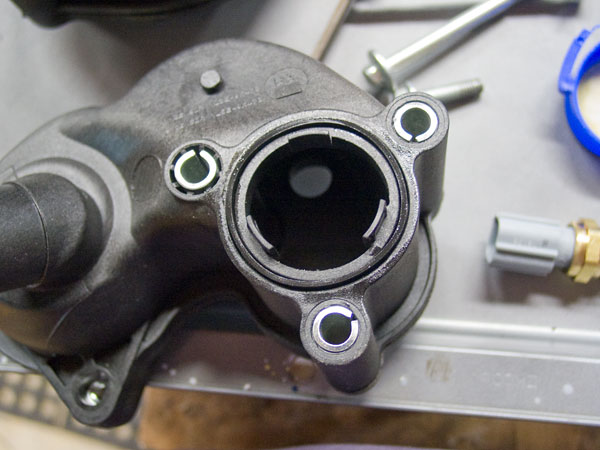
Next, flip the housing over and slip in the rearmost bolt. You have to put this in now because once the housing is in place there isn't enough clearance to get it in the hole. It's also easier to install the front bolts now too. It's not impossible to get them in later, but that one under the intake manifold is a little difficult, so save yourself the trouble.
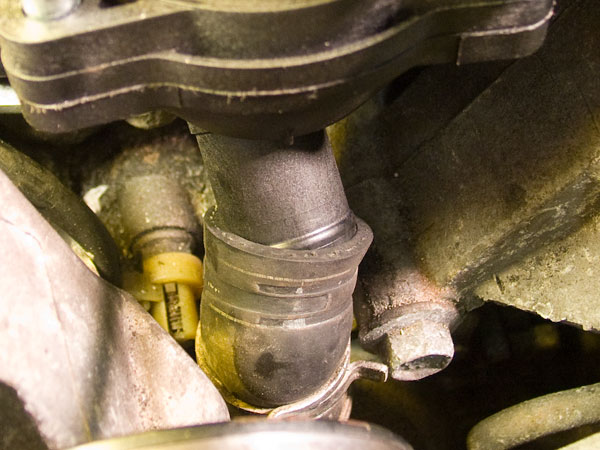
Before you can set the housing in place and tighten the bolts, you have to get it into the lower hose that leads to the water pump. You might need to lower the squeeze clamp a little bit more to make room (I did). Slip the housing nipple into the hose all the way and then use your needle nose and then large channel lock pliers to reinstall the clamp.
As you're slipping that lower hose nipple into place, you need to remember to be conscious of those three tabs on the bottom of the housing where it meets the engine. Make sure you lower it into place instead of pushing it into place so that those tabs don't get damaged!

Now that you've got it set into place, you can tighten the bolts. First, twist them with your fingers as much as you can. Then, using your 8 mm flex socket and a long extension, tighten each bolt a bit in succession. Go in a circle, tightening each bolt a little and then moving on to the next one. You want to tighten these to 10 nm (89 in. lbs.). In other words, not too much! Don't crack your new housing.
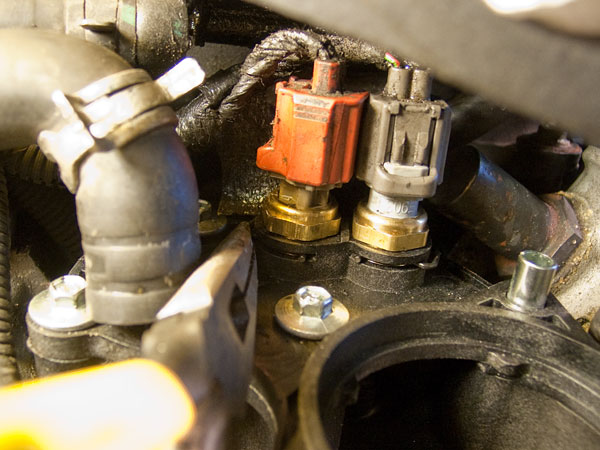
Step 8: Install New Sensors and Reattach Upper Hoses
Wet the o-rings on each of the new sensors with a bit of fresh coolant. Then grab the sensor with the light grey housing (part # 3L8Z-12A648-BA) and slip it into the grey connector until it snaps into place. Now insert this connector into its mounting hole (the rightmost hole when looking straight on it). The clearance is tight, but it will fit. Angle it as much as you can until you can't anymore and then shift it straight up and down into the hole. Now repeat with the other sensor (part # 3F1Z-10884-AA) and the red connector. Then, using your needle nose pliers, insert new retaining clips to hold the sensors in place.
Demon has a tip about these little retaining clips. Tie a piece of fishing line to them before you try to insert them. That way, if they pop off before you get them seated (like they did for him), then you won't lose them. I didn't have any problem when I inserted the, but no question they could be hard to find if you lost your grip on them.
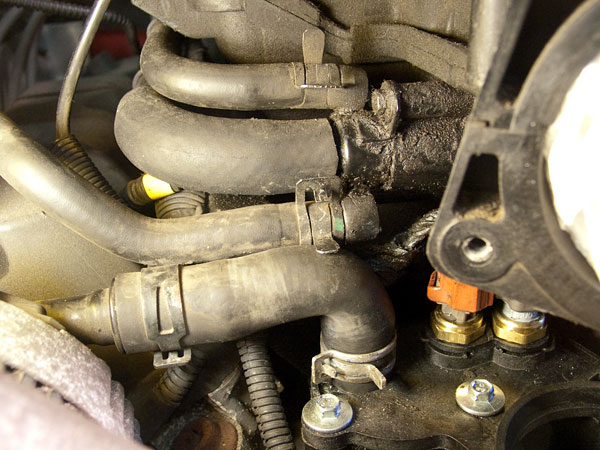
Now you need to reinstall the upper hoses. Slip the heater hose back into place on the lower housing nipple. Squeeze the clamp back into place. Then rotate the squeeze clamp on the next hose up a bit to make room for the vacuum hose above that to slip into place. Slip the final vacuum hose into place. You probably have a clamp on this hose but I don't. Reinstall your clamp.
Step 9: Install New Thermostat
Find the thermostat o-ring and the new thermostat. Wet the o-ring with some fresh coolant. Slip the o-ring onto the thermostat from the top. Then slip the thermostat (with its o-ring) into place in the lower housing. I oriented mine the same as the old one that came out, but I don't think it makes a difference.

Once in place, insert the upper housing thermostat cover's nipple into the upper radiator hose. Don't put the clamp in place yet, though (in case you need to twist the housing a bit). Then lower the cover down onto the lower housing. It has to line up just right. Be patient, and carefully lower it down until it's down all the way.

Insert the bolts into place and tighten using the 8mm flex socket to 10 nm (89 in. lbs.). Remember to tighten each one a bit at a time and go in a circle. When done, move the upper radiator hose squeeze clamp back into place.
Next -> Step 10: Reconnect Everything
this site was written by ben grosser
all content and photos are © 2012 and may not be used without permission.